Imagine the satisfaction of nurturing your very own tropical paradise within your home garden, filled with the dazzling display of vivid, heart-shaped blooms. Growing anthurium seeds at home is your chance to do just that! By following our guidance, you will be able to cultivate flamboyant anthurium flowers from seeds and enjoy the color and charm that these tropical plants can bring to your living space. With the right cultivation techniques, guidance, and care, you too can experience the delight of watching your anthurium flower seeds transform into breathtaking blooms. Join us in this exciting journey and embrace the adventure of seed propagation, as we help you grow your anthuriums at home like never before.
Key Takeaways:
- Growing anthurium seeds at home can be a rewarding experience, yielding beautiful, vibrant blooms.
- Anthuriums are tropical plants known for their stunning heart-shaped flowers and lush foliage.
- Seed propagation allows for stronger, more acclimated plants compared to purchasing mature plants.
- Proper cultivation techniques, including soil preparation, sowing, and post-planting care, are crucial to the success of growing anthuriums at home.
- Our guidance will cover everything from selecting the right anthurium seeds to transplanting your seedlings to larger pots for a thriving home garden display.

Understanding the Anthurium Plant and Its Seeds
As a popular choice among indoor plant enthusiasts, anthurium plants are known for their attractive, flamboyant flowers and resilient foliage. Originating from tropical regions, anthuriums can be a captivating addition to any home garden. Before you start growing these lovely plants from seeds, let’s delve a little deeper into their intriguing world.
The Basics of Anthuriums
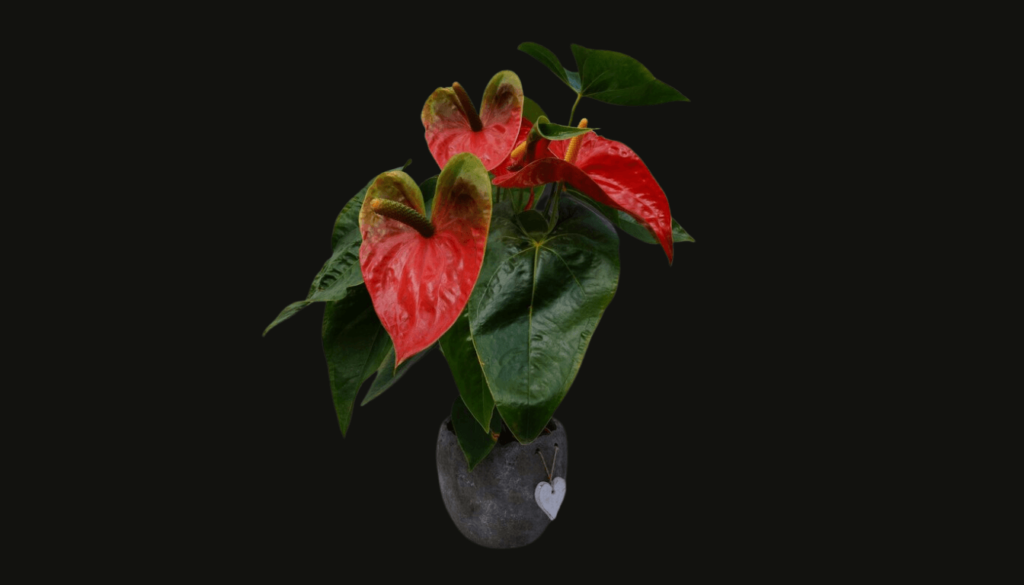
Anthuriums, also known as tropical anthuriums, belong to the Araceae family and have more than 800 known species. These lush, foliage plants are native to Central and South America, as well as the Caribbean. The most well-known species, Anthurium andraeanum, boasts heart-shaped, vibrant flowers that come in various shades of red, orange, pink, or white. Its glossy foliage complements these captivating blossoms.
Although anthurium flowers are the stars of the show, they aren’t flowers in the typical sense. Their radiance comes from a modified leaf called a spathe, which surrounds the true, tiny flowers arranged on a central spike called a spadix.
Types of Anthurium Seeds
With so many gorgeous anthurium species and hybrids available, gardeners have a wide array of anthurium seed types to choose from. Some of the most popular species and hybrids for home cultivation include:
- Anthurium andreanum: Known for its classic heart-shaped flowers in various shades of red, pink, and white.
- Anthurium crystallinum: Recognizable by its large, striking, velvety leaves that feature prominent white veins.
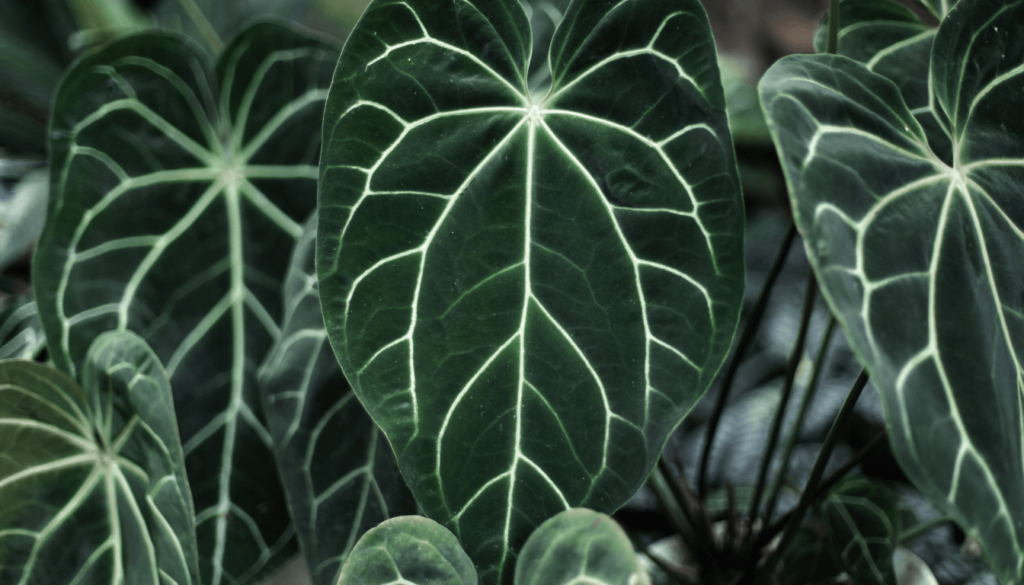
- Anthurium clarinervium: Distinct for its attractive dark green leaves with contrasting white venation.
- Anthurium warocqueanum: Exhibits elongated, velvety leaves that can reach over 3 feet in length.
- Anthurium Faustino’s Giant: A stunning hybrid with large, elegant leaves and a tall spadix bearing reddish-purple flowers.
Selecting the right seed variety for your home garden depends on your environmental conditions and personal preferences, but with these options and more, there’s no shortage of spectacular anthuriums to choose from.
Benefits of Growing Anthurium From Seeds
Beyond adding natural beauty to your living space, there are several advantages to growing anthuriums from seeds:
- Stronger plants: Anthurium seeds often grow into healthier, more vigorous plants as they adapt to their surroundings from a young age.
- Rewarding experience: Watching anthuriums grow from seeds into fully developed, flowering plants is a fulfilling process that can deepen your appreciation for gardening.
- Cost-effective: Purchasing seeds is generally more economical than buying mature plants, especially when considering the diverse range of seed varieties available.
With these benefits, it’s easy to see why propagating anthurium plant seeds is such an appealing endeavor. So why not give it a try and enjoy the beauty of your own thriving anthurium garden!
Choosing the Right Anthurium Seeds for Your Home
Selecting the perfect anthurium seeds for your home garden can ensure a successful and enjoyable growing experience. When choosing the right seeds, several factors should be taken into consideration, including your local climate, space availability, and personal preferences. In this section, we will guide you through the process of selecting the best anthurium seeds for your home garden.
- Local Climate: Anthuriums thrive in warm, humid climates and might struggle in colder regions. Before selecting anthurium seeds, research the species that can adapt to your area’s temperature and humidity levels. If you live in a colder climate, consider choosing anthurium species that can tolerate lower temperatures or grow them indoors, where you can control the environment.
- Space Availability: Keep in mind the space you have available indoors or outdoors for your anthurium plants. Some species may grow taller or larger than others, requiring more room. Be sure to choose seeds from species whose mature size fits well within the area you plan to grow them.
- Personal Preferences: Anthuriums come in various shapes, sizes, and colors. Take time to explore the different species and hybrids to find the ones that best suit your taste and home aesthetics. Be open to experimenting with different species to find the perfect addition to your garden.
With these factors in mind, we’ve compiled a table showcasing some popular anthurium species, their size, and ideal growing conditions to help you choose the perfect seeds for your home garden.
| Anthurium Species | Average Size | Ideal Growing Conditions |
|---|---|---|
| Anthurium andraeanum | 1.5 – 2 feet tall | Warm, humid climate or greenhouse environment |
| Anthurium crystallinum | 2 – 3 feet tall | Indoors with bright, indirect light and high humidity |
| Anthurium hookeri | 4 – 6 feet tall | Warm climate outdoors or ample space indoors |
| Anthurium veitchii | 4 – 5 feet tall | Indoors in a bright location with high humidity |
Always purchase anthurium seeds from reputable sellers to ensure high-quality and healthy seeds. Once you’ve selected the ideal anthurium seeds for your home, follow the subsequent sections of our guide to learn about proper planting, maintenance, and care to help your anthurium seedlings flourish into beautiful, vibrant plants.

Essential Supplies for Planting Anthurium Seeds
When it comes to establishing thriving anthurium seedlings, it is crucial to have the necessary supplies on hand. In this section, we’ll discuss the optimal containers, soil, and watering tools to ensure your anthurium seeds germinate and develop into healthy plants.
Starting Containers and Pots
For burgeoning anthurium seedlings, it’s essential to select appropriate containers or pots that meet their specific needs. When choosing containers for anthurium seedlings, consider the following aspects:
- Size: Pick a container with a diameter of 2 to 4 inches for each seedling, providing ample space for early root development
- Material: Opt for materials such as plastic, terracotta, or ceramic pots. Each material has unique benefits; for example, plastic retains moisture better, while terracotta and ceramic have better drainage
- Drainage: Ensure the selected pot or container has drainage holes to prevent over-watering and root rot
Soil Requirements for Anthurium Seedlings
Creating the perfect soil mix for anthurium seeds is vital for early development. Anthuriums require a well-draining soil mixture that strikes a balance between nutrients, aeration, and moisture retention. The composition should include:
- Potting mix: A high-quality, soilless potting mix is an excellent base for anthurium planting soil
- Coarse materials: Add perlite, vermiculite, or orchid bark (at least 30-40% of the mixture) to improve drainage and aeration
- Organic matter: Peat moss or compost (up to 30% of the mixture) can increase water retention and provide essential nutrients
Watering Tools and Humidity Trays
Maintaining consistent moisture levels during the germination and early growth stages of anthurium seeds is crucial. Consider these watering tools and techniques to ensure optimal humidity:
- Watering can: Choose a watering can with a fine spray nozzle or a long spout for gentle, controlled watering
- Humidity trays: Utilize humidity trays to maintain seedling humidity. Place pots above a tray filled with water and pebbles, allowing evaporation to raise humidity levels without direct contact between seedlings and water
- Moisture meter: Employ a moisture meter to periodically check soil moisture and ensure it remains consistent, preventing over-watering or under-watering
- Misting: Lightly mist the soil and seedlings using a spray bottle to maintain surface moisture
By incorporating proper containers, soil mixtures, and watering techniques, you are setting the stage for successful anthurium seed propagation. These essential supplies will provide your seeds with the necessary environment to germinate and grow, eventually producing stunning, vibrant blooms to adorn your home garden.
Step-by-Step Guide to Sowing Anthurium Seeds
In this section, we will guide you through the process of sowing anthurium flower seeds, including preparing the soil for anthurium planting, seed germination techniques, and post-sowing seed care.
Preparing the Soil Mixture
Anthuriums thrive in a well-draining, slightly acidic soil mix. Preparing the right soil mix ensures a healthy environment for germination and seedling growth. Here’s a simple recipe for creating an ideal anthurium soil mix:
- 50% peat moss
- 30% perlite
- 20% orchid bark or coconut coir
Mix these ingredients thoroughly to create a uniform blend. Ensure that the mix is moist but not soggy before planting your seeds.
Sowing Techniques for Optimal Germination
Proper sowing techniques play a crucial role in seed germination and seedling development. Follow these steps for successful anthurium seed sowing:
- Fill your seeding containers with the prepared anthurium soil mix, leaving about 1/2 inch of space at the top.
- Lightly press the soil in each container to remove air pockets and create a firm planting surface.
- Place the anthurium seeds on the soil surface, ensuring that seeds are evenly spaced and not touching each other. A 1/2 inch to 1-inch distance between seeds will help prevent overcrowding and promote healthy root development.
- Cover the seeds with a thin layer of vermiculite or perlite to maintain moisture while still allowing light to penetrate for germination.
- Water the seeds gently using a fine mist spray bottle. Make sure not to displace the seeds during watering.
- Cover the seeding containers with a clear plastic wrap or dome to maintain humidity during germination.
Anthurium seeds can take anywhere from 2 to 4 weeks to germinate. Maintain consistent moisture levels and temperatures between 75°F and 85°F during this period.
Caring for Freshly Sown Seeds
Proper post-sowing seed care sets the stage for healthy seedling growth. Observe the following steps to ensure the best chances of successful germination:
- Monitor the temperature inside the seeding containers. Maintain temperatures between 75°F and 85°F for optimal germination rates.
- Keep the soil consistently moist but not waterlogged. Use a spray bottle with fine mist settings to gently water the soil without displacing the seeds or disrupting germination.
- Check the humidity levels within the seeding containers, ensuring that the plastic wrap or dome maintains a humid environment. As seeds germinate, leave small gaps in the plastic wrap to allow for air circulation and prevent mold growth.
- Once germination begins and seedlings emerge, uncover the seeding containers to increase ventilation and reduce the chances of mold or disease.
- Introduce a gentle light source, such as fluorescent lights or filtered sunlight, for the emerging seedlings. Provide 14 hours of light per day, with 10 hours of darkness for healthy growth.
As your seeds germinate and seedlings emerge, continue to monitor their growth and adjust your care routine as needed. With proper care, your anthurium plants will transition from seeds to thriving seedlings ready for transplanting.

Managing Light and Temperature for Anthurium Seed Growth
Anthurium seeds require specific light conditions and temperature ranges to thrive. Finding the delicate balance needed for these tropical plants is crucial, and may require some adaptation depending on your home environment. In this section, we’ll explain the optimum light requirements for anthurium seeds and how to control temperature for the seedlings.
Light Requirements for Anthurium Seeds
Anthurium seeds need filtered light to grow, as direct sunlight might burn the young leaves. It is essential to provide the seeds with bright, indirect light, ideally by placing them near a window with sheer curtains, or using artificial light sources like fluorescent lights or LED grow lights.
Tip: Rotate your pots or trays every week to ensure even distribution of light to all the seedlings.
Temperature Control for Anthurium Seedlings
Since anthuriums are tropical plants, they grow best in warm temperatures. The optimal temperature range for anthurium seedlings is between 70°F and 80°F (21°C and 27°C) during the day, and around 65°F (18°C) during the night. Maintaining a stable temperature within this range is crucial for healthy seedling development. To monitor the temperature, use a thermometer placed near the anthurium seedlings and make adjustments as needed.
“Anthurium seedlings thrive in warm temperature ranges between 70°F and 80°F (21°C and 27°C) during the day.”
Here are some tips to control temperature for your anthurium seedlings:
- Adjust the thermostat to maintain the desired temperature range.
- Use seedling heat mats or gentle air circulation from a fan to avoid overheating.
- Move the seedlings to a cooler area of your home during nighttime, or when temperatures rise above optimal levels.
Remember: Sudden temperature fluctuations can stress the young plants and affect their growth. Monitor the temperature and make gradual changes if needed.
Adapting to Various Climates
If you live in an area where the climate deviates from the ideal conditions for anthurium seedlings, you might need to take additional measures or use alternative growing methods. Consider the following:
- For colder climates, invest in a proper heating system and insulation to maintain a consistent warm temperature.
- In dry climates, use a humidifier to raise humidity levels and create a more comfortable environment for the seedlings.
- For areas with strong sunlight, invest in good quality shades or light-filtering curtains to block direct sun exposure on the seedlings.
In conclusion, anthurium seed growth relies heavily on proper light and temperature conditions. By monitoring and controlling these factors, you’ll give your anthurium seedlings the best chance to develop into beautiful, healthy plants.
Watering and Feeding Your Growing Anthurium Seedlings
Proper care and attention to the watering and fertilizing needs of your anthurium seedlings will result in healthy and strong plants. In this section, we will discuss the best practices regarding the watering needs and schedules, selecting the most suitable fertilizer, and planning an effective watering routine to encourage growth.
Understanding the Watering Needs
Anthurium seedlings have specific watering requirements to keep them hydrated and healthy. Too little water leads to poor growth or wilting, while excessive water causes root rot and other issues. It is crucial to maintain a balance. A general rule of thumb is to keep the soil moist but never waterlogged or completely dry. When the top 1-2 inches of the soil is dry, it’s time to water the plants lightly. Using a spray bottle or misting system helps maintain the humidity levels necessary for these tropical plants.
Choosing the Right Fertilizer for Anthuriums
Selecting the right fertilizer for your anthurium plants can make all the difference in their growth and development. As anthuriums grow throughout their life cycle stages, they require different types of nutrients. Look for a fertilizer specifically formulated for anthuriums, which are rich in phosphorus and potassium. An ideal anthurium plant food consists of a balanced ratio of nitrogen, phosphorous, and potassium, commonly in a 1:2:1 ratio (N-P-K). Additionally, it’s essential to use a slow-release fertilizer and apply it according to the manufacturer’s instructions.
Schedules for Watering and Feeding
Creating a consistent watering and feeding schedule is key to keeping your anthurium seedlings vibrant. To help you establish an effective routine, consider the following guidelines:
- Water seedlings at least once a week, adjusting this frequency based on environmental factors such as temperature, humidity, and light exposure.
- Use a misting system daily, especially when the relative humidity levels are below 50%.
- Fertilize your anthurium plants every 4-6 weeks during their growing season (spring and summer). During the fall and winter months, reduce the frequency to every 8-10 weeks.
- Monitor your plants for signs of over or under-watering, adjusting the schedule as needed.
Note: Tailor your watering and feeding schedule to the unique needs of your specific anthurium variety, and consider seasonal changes and environmental factors.
| Watering Frequency | Season | Fertilizing Frequency |
|---|---|---|
| 1x per week | Spring & Summer | 4-6 weeks |
| As needed | Fall & Winter | 8-10 weeks |
By implementing these best practices for watering and feeding, you’ll support your anthurium seedlings through each stage of their growth, ensuring healthy and thriving plants in your home garden.

Monitoring and Dealing with Pests and Diseases
Growing anthurium plants can bring joy and vibrant beauty to your home garden, but as with any plant, they may also attract various pests and diseases. Tackling these issues effectively requires a combination of early identification, proper treatment, and preventative measures. In this section, we’ll discuss common anthurium plant pests, disease treatment options, and sustainable organic pest control solutions.
Common Pests in Anthuriums
Anthurium plants may be susceptible to infestations by various pests, including aphids, mealybugs, spider mites, and thrips. Identifying the early signs of infestation can help you prevent significant damage to your plants. Common signs of pest infestation include visible insects, damaged or discolored leaves, and stunted growth.
Tip: Keep an eye out for the presence of natural pest predators like ladybugs and lacewings, which can help control the pest population on your anthurium plants.
Treatment and Prevention of Diseases
Disease treatment in anthuriums often involves identifying symptoms early, isolating affected plants, and using appropriate plant-safe treatments to manage outbreaks. Common diseases affecting these plants include bacterial leaf blight, fungal root rot, and bacterial soft rot. Preventing seedling diseases can often be achieved through proper sanitation, consistent and careful watering, and maintaining adequate spacing between plants.
- Inspect your anthurium plants regularly for signs of disease, such as yellowing or wilting leaves, black or brown spots, and fungal growths.
- Remove and dispose of any affected plant material promptly, and clean your gardening tools thoroughly to prevent the spread of diseases.
- Apply relevant treatments, such as fungicides or bactericides, as needed while following manufacturer instructions for usage and dosage.
Organic Pest Control Solutions
Many gardeners prefer organic pest management for anthuriums that minimize environmental impact and promote plant health. Some eco-friendly pest solutions include introducing beneficial insects and using natural, non-toxic products like neem oil or insecticidal soap.
| Organic Pest Control Method | Description |
|---|---|
| Beneficial insects | Introduce natural predators like ladybugs and lacewings to your garden to help control and prevent pest infestations. |
| Neem oil | An organic, plant-based oil that effectively targets a wide range of pests and diseases without harming beneficial insects. |
| Insecticidal soap | A gentle, non-toxic solution used to control soft-bodied pests such as aphids and spider mites by disrupting their cell membranes. |
By diligently monitoring your anthurium plants for signs of pests and diseases, and implementing timely, environmentally conscious treatment methods, you can enjoy the stunning beauty of your tropical blooms while maintaining a healthy, sustainable garden.
Pruning and Maintenance Tips for Healthy Anthurium Plants
Anthurium plants, known for their vibrant blooms and tropical flair, require proper care and maintenance to grow with vigor and produce impressive flowers. In this section, we’ll guide you through best practices when it comes to pruning your anthurium plants and maintaining their health.
Why Pruning is Important
Pruning serves several purposes that contribute to the overall health of your anthurium plants. Proper pruning ensures that:
- Dead or damaged leaves and blooms are removed, preventing the spread of diseases and pests.
- Energy is redirected towards stronger, healthier parts of the plant, encouraging growth and flowering.
- The plant maintains an attractive appearance, with healthy foliage and blooms on display.
- Adequate air circulation is provided, reducing the risk of fungal growth and infestations.
When to Prune your Anthurium Plants
Timing is one of the most crucial factors to consider when pruning anthurium plants. The ideal time to prune your plant is during its dormancy phase, when the plant is least likely to undergo stress from the process. Typically, this period occurs in the late fall or early winter. However, you can also proceed with minimal pruning throughout the year as necessary to remove dead flowers, leaves, or any infected parts of the plant.
How to Prune your Anthurium Plants
Pruning anthurium plants requires a gentle touch and careful attention to detail. Follow these steps to ensure a successful pruning process:
- Disinfect your pruning shears or scissors by wiping the blades with rubbing alcohol before and after use.
- Monitor your anthurium plant closely, scanning for dead or damaged leaves, flowers, and stems that need to be removed.
- Cut the affected parts of the plant at a 45-degree angle, leaving at least 1 inch of stem above the main stem or leaf node. Avoid cutting into healthy tissue or directly on a joint or node.
- Discard the removed parts promptly to prevent any spread of diseases or pests.
Maintenance Tips for Healthy Anthuriums
Maintaining the overall health of your anthurium plants requires a comprehensive approach that goes beyond just pruning. Keeping your anthuriums healthy involves a consistent and diligent routine, summarized by the following essential tips:
| Maintenance Category | Tips |
|---|---|
| Watering | Become familiar with the watering needs of your anthurium plants and follow a regular schedule. Prevent over-watering by allowing the soil to dry out slightly between watering sessions. |
| Feeding | Apply a balanced foliage houseplant fertilizer during the growing season (spring to fall) every 4-6 weeks, to provide necessary nutrients that promote a thriving plant. |
| Light | Ensure your anthuriums receive adequate indirect sunlight. They prefer bright, filtered light; avoid exposure to direct sun, as it may lead to scorched leaves. |
| Humidity | Provide a humid environment for your anthuriums, without causing the soil to become soggy. You can achieve this by using humidity trays or placing your plant near a humidifier. |
| Pest and Disease Management | Regularly inspect the plant for any signs of pests and diseases, and apply timely treatments when necessary. Keep the growing area clean and avoid stressing the plant to discourage pest infestations. |
By following these chopping tips and maintenance routines, your anthurium plants can thrive and produce vibrant, long-lasting blooms that will bring a touch of the tropics to your home garden. Enjoy the satisfaction of nurturing your plants and watching them flourish day by day with these healthy anthurium tips and techniques.
Transplanting Anthurium Seedlings to Larger Pots
As your anthurium seedlings grow and mature, transplanting them into larger pots becomes necessary to ensure their continued healthy development. In this section, we will guide you through the process of transplanting anthurium seedlings, from identifying the optimal transplanting time to selecting the right pot size and material, and acclimating your plants to their new environments.
When and How to Transplant
Knowing the right time to transplant your anthurium seedlings is crucial, as it minimizes stress to the plants and ensures they can continue growing with minimal disruptions. The optimal transplanting time typically occurs when the seedlings have developed multiple sets of true leaves and have outgrown their initial container. Common signs that it’s time to transplant include roots growing out of the drainage holes and the plant becoming top-heavy.
When transplanting your anthurium seedlings, follow these steps:
- Gently water the seedlings in their current container, ensuring the soil is moist.
- Prepare the new pot with a suitable anthurium-specific soil mix and dampen it slightly.
- Carefully remove the seedling from its current container, taking care not to damage its roots.
- Place the seedling in the new pot, allowing for enough space for root growth and development.
- Fill in the gaps with more soil mix, ensuring the roots are well-supported and covered.
- Water the transplanted seedling thoroughly to help it settle into its new environment.
Choosing the Right Pot Size and Material
Pot size and material are crucial factors you should consider when transplanting anthurium seedlings. It’s essential to select a pot that accommodates the plant’s root development and provides optimal drainage conditions. A general rule of thumb is to choose a pot that is 2-3 inches larger in diameter than the current one.
When it comes to selecting the ideal pot material for anthuriums, the most common options are:
- Plastic pots: Lightweight, affordable, and retain moisture, but prone to overheating in direct sunlight.
- Ceramic pots: Heavy, more substantial, and provide better insulation, but can be difficult to move, and may not offer the best drainage.
- Terra cotta pots: Made from porous clay that absorbs moisture, helps with drainage and aeration, but can require more frequent watering.
Regardless of the pot material you choose, ensure it has sufficient drainage holes to prevent waterlogged soil and root rot issues.
Had some fun adventures visiting family, but it's so good to be back home with my plant babies! I came home to so much exciting progress and no dead plants!!! 💃
— Chriggs (@hortichriggs) September 22, 2021
My anthurium bakeri seeds came on the trip with me and 10/12 have sprouted! pic.twitter.com/anXB3qbpoc
Acclimating Anthurium Plants to New Environments
After transplanting your anthurium seedlings, it’s vital to acclimate them to their new environment, as they may experience some shock during the adjustment process. Here are a few tips to help your plants acclimate and minimize transplant shock:
- Introduce the transplanted seedlings to their new location gradually, exposing them to any changes in lighting conditions or temperatures slowly.
- Keep an eye out for any signs of stress or wilting, and make necessary adjustments to their care routine as needed.
- Continue to monitor their growth and overall health, ensuring they receive proper watering, nutrients, and adequate air circulation.
By following these guidelines, your anthurium seedlings should transition smoothly into their new pots and continue to grow and flourish into beautiful and healthy plants.
Conclusion
In this guide, we have provided comprehensive information on how to grow thriving anthurium plants from seeds. The process of successful anthurium seed propagation is truly satisfying as you watch your home garden bloom with these stunning tropical flowers.
Growing anthurium plants from seeds requires attention to detail and consistent care, but with the information and guidance provided in this article, we hope we have inspired you to embark on this rewarding gardening journey. By carefully selecting seeds, providing the right growing environment, and offering proper care, your anthurium seedlings will have the best chance of developing into strong, healthy plants that will be a pride and joy in your home garden.
Remember, the keys to success in growing anthurium plants from seeds are selecting high-quality seeds, maintaining optimal light and temperature conditions, watering properly, and committing to diligent pest and disease management. With perseverance and care, your home garden will soon be filled with vibrant, eye-catching anthurium blooms that reflect your hard work and dedication.
Also Read
Discover the Beauty of Anthurium Metallicum Plants Today!
Discover the Exotic Anthurium Moodeanum – Your Plant Guide
Discover the Beauty of the Anthurium Plowmanii Plant
FAQ
How long does it take for anthurium seeds to germinate?
Germination time for anthurium seeds varies depending on the species, but generally, seeds should begin to germinate within 3 to 6 weeks after planting. Ensuring that the seeds are kept in a consistently warm and humid environment will improve the germination success rate.
Can anthurium plants be grown in any climate?
Anthurium plants are native to tropical regions and thrive in warm, humid environments. If you live in a cooler climate, you can still grow anthuriums successfully, but they may require additional care, such as a greenhouse or indoor environment with supplemental lighting and climate control.
When should I start fertilizing my anthurium seedlings?
Start fertilizing anthurium seedlings once they have developed their first set of true leaves. Use a balanced fertilizer diluted to half strength and apply it according to the recommended feeding schedule for seedlings.
How often should I water my anthurium seedlings?
Anthurium seedlings require consistent moisture, but also good drainage to prevent root rot. Water your seedlings when the top of the soil begins to feel dry, ensuring that the soil stays evenly moist but not overly wet. Ensure your chosen container has adequate drainage to avoid waterlogging.
What type of soil is best for anthurium seedlings?
Anthurium seedlings thrive in a well-draining soil mixture with a mix of ingredients like peat moss, pine bark, and perlite to ensure adequate aeration, moisture retention, and nutrition. Adjust the proportions depending on your specific climate and environmental conditions to create the optimal mix for your anthurium seedlings.
How do I know when my anthurium seedlings are ready to be transplanted?
Anthurium seedlings can be transplanted to larger pots when they have developed a strong root system and several sets of true leaves. Keep an eye on their growth and look for signs of overcrowding, root-bound plants, or slowed growth, which may indicate that they are ready for transplanting.