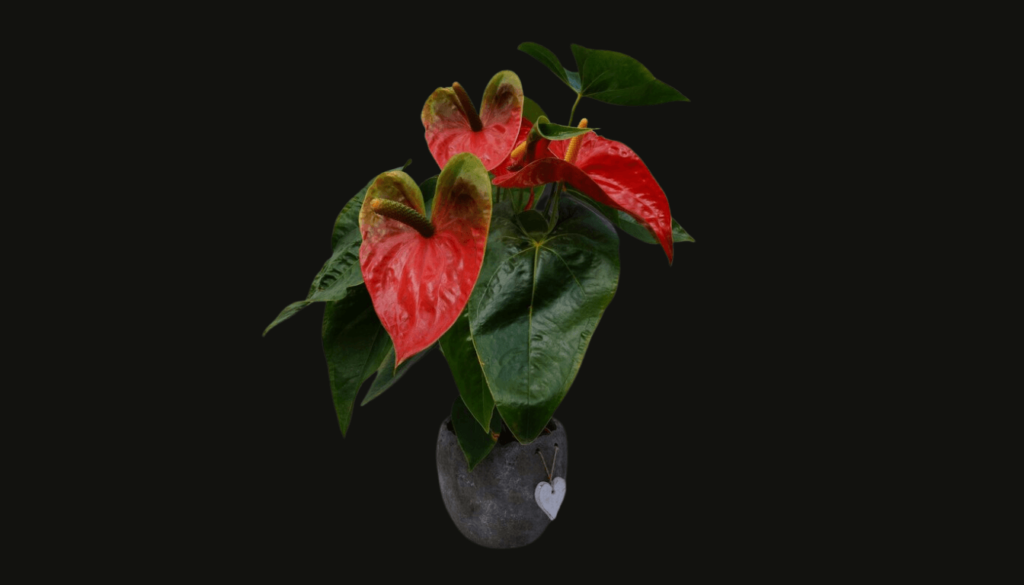
As indoor plant enthusiasts, we understand the importance of keeping our green companions happy and healthy. In this article, we’ve put together a comprehensive, step-by-step guide to repotting Anthurium Besseae Aff. – a stunning tropical plant that adds an exotic touch to any space it inhabits. Whether you’re new to indoor plant care or looking to level up your care routine, our guide will ensure that your Anthurium Besseae Aff. not only survives but thrives indoors, with expert tips and advice every step of the way.
Key Takeaways
- Understand the unique needs of Anthurium Besseae Aff.
- Learn to recognize the signs when it’s time to repot your plant.
- Choose the perfect pot and soil mix for healthy root growth.
- Follow our step-by-step repotting process for a stress-free experience.
- Master essential care tips after repotting for your Anthurium Besseae Aff.’s continued growth.
Understanding the Unique Needs of Anthurium Besseae Aff.

To provide the best care for your Anthurium Besseae Aff., it is essential to understand its unique needs. In this section, we will delve into the specific requirements of Anthurium Besseae Aff., addressing aspects such as light, temperature, humidity, and the signs of a happy plant. With this foundational knowledge, you will be better equipped to help your Anthurium thrive in its indoor environment.
“The key to a thriving Anthurium Besseae Aff. is understanding and catering to its specific environmental needs.”
Let’s explore the essential elements of an Anthurium Besseae Aff care guide:
- Light requirements
- Temperature preferences
- Humidity levels
- Signs of a healthy plant
Light Requirements
Anthurium Besseae Aff. requires bright, indirect light to flourish. Direct sunlight can cause the leaves to burn or develop yellow spots. Aim for a location near an east or west-facing window that receives filtered light.
Temperature Preferences
Native to Central and South America, Anthurium Besseae Aff. thrives in warm temperatures. Maintain a temperature range of 65°F to 80°F (18°C to 27°C) for optimal growth. Avoid drastic temperature fluctuations that can stress the plant.
Humidity Levels
Hailing from tropical rainforests, this plant species love high humidity levels. Aim for a humidity level of 60% to 80% for your Anthurium Besseae Aff. To maintain such humidity, consider using a humidifier, placing the plant on a tray of water and pebbles, or grouping it with other moisture-loving plants.
Signs of a Healthy Plant
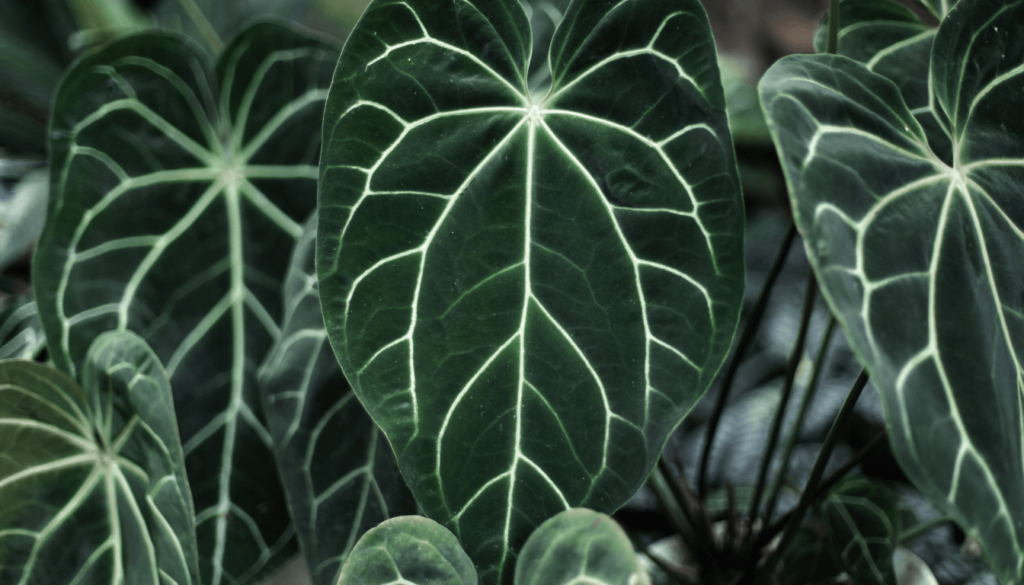
Knowing the signs of a healthy Anthurium Besseae Aff. will help you gauge your plant’s well-being and make any necessary adjustments to its care regimen. Look for these indicators:
- Glossy, deep-green leaves
- Vibrant, long-lasting flowers
- Consistent growth of new leaves
- No signs of pest infestations or diseases
By focusing on these four crucial factors, you can create an indoor environment that caters to the Anthurium Besseae Aff unique needs and promotes healthy, vibrant growth.
| Aspect | Optimal Condition |
|---|---|
| Light | Bright, indirect light |
| Temperature | 65°F to 80°F (18°C to 27°C) |
| Humidity | 60% to 80% |
| Signs of Health | Glossy leaves, vibrant flowers, consistent growth |
Equipped with this Anthurium Besseae Aff care guide knowledge, you will be better prepared to help your plant thrive and grow into a luscious, show-worthy specimen.
When to Repot Your Anthurium Besseae Aff: Recognizing the Signs
Repotting your Anthurium Besseae Aff. is a crucial aspect of its care, ensuring that this beautiful plant keeps thriving in your living space. As these plants gradually expand, they can outgrow their pots, resulting in overcrowded roots, limited growth, and water drainage issues. To maintain a healthy Anthurium Besseae Aff, it is essential to recognize the signs that indicate it’s time for repotting.
Let’s take a closer look at the key indicators to watch out for, along with some handy tips on how to examine your plant effectively.
- Overcrowded Roots: Over time, the roots of your Anthurium Besseae Aff. can outgrow the confines of their pot. When this happens, it’s time to provide them with a larger, more spacious home. To check for overcrowded roots, gently remove the plant from its pot and inspect the root system. If the roots are densely packed and have begun circling around the bottom of the pot, it’s time to repot.
- Sluggish Growth: If you’ve noticed that your Anthurium Besseae Aff. has slowed down in terms of growth despite receiving proper care, it could be a sign that its pot has become too cramped. A larger pot will provide the plant with more room to expand, encouraging renewed growth.
- Water Drainage Issues: One of the most common problems faced by pot-bound Anthurium Besseae Aff is poor water drainage. If you find that water tends to sit on the surface or drains extremely slowly, it might be a sign that your plant requires repotting. A new pot with better drainage will prevent waterlogging and ensure that your plant remains healthy.
An additional factor to consider when deciding on repotting is the anthurium besseae aff propagation stage. If you plan to propagate your plant, repotting can be an ideal time to divide the plant carefully, creating new individual plants that can be placed in separate pots.
Remember: If you’re unsure whether it’s time to repot your Anthurium Besseae Aff, it’s better to err on the side of caution. Providing your plant with a slightly larger pot and fresh soil can only benefit its overall health and growth.
In summary, the key to repotting Anthurium Besseae Aff on time is vigilance. Regularly monitor the plant for any signs of overcrowded roots, sluggish growth, or water drainage issues. By staying attentive and repotting at the right moment, you’ll ensure your Anthurium Besseae Aff remains healthy and vibrant for years to come.
Selecting the Right Pot and Soil for Your Anthurium Besseae Aff
Selection of the correct pot and soil is critical for Anthurium Besseae Aff. health. In this section, we’ll advise on pot material and size, and what soil compositions provide the perfect balance of drainage and nutrient retention. We’ll guide you through the process of choosing the best pot for adequate drainage and how to mix the perfect soil for healthy root growth.
Choosing the Best Pot for Adequate Drainage
When looking for the best pot for your Anthurium Besseae Aff, it’s essential to consider the material and size of the pot. Both of these factors play a significant role in ensuring adequate drainage and preventing waterlogging and root rot, which are critical elements for the longevity of Anthurium Besseae Aff.
Here are some recommendations for choosing the right pot for your Anthurium Besseae Aff:
- Material: Plastic, terracotta, and ceramic pots are suitable options. Consider choosing pots with drainage holes to avoid water accumulation at the bottom.
- Size: Select a pot that is 1-2 inches larger in diameter than the current root ball of your Anthurium Besseae Aff. This ensures enough room for the roots to grow without being constrained.
Mixing the Perfect Soil for Healthy Root Growth
The ideal soil mix is key to a thriving Anthurium Besseae Aff. We’ll provide tips for creating the optimal soil mix that caters to the specific nutrient and aeration needs of the plant’s root system. A well-draining soil mix with the proper balance of ingredients will encourage healthy root growth and prevent root rot.
| Ingredient | Ratio | Benefits |
|---|---|---|
| Peat Moss or Coconut Coir | 50% | Retains moisture and provides aeration |
| Orchid Bark or Perlite | 30% | Increases drainage and air circulation |
| Activated Charcoal | 10% | Removes impurities from the soil and prevents mold growth |
| Pumice or Lava Rock | 10% | Improves drainage and provides nutrients |
To create your Anthurium Besseae Aff soil mix, simply combine the ingredients according to the ratios listed above in a large container. Mix well to ensure even distribution of materials. Fill the new pot with the prepared soil mix, and you’re ready to repot your Anthurium for healthy growth and lasting beauty.
Step-by-Step Repotting Process

In this section, we will guide you through a comprehensive, step-by-step repotting process, from the initial removal of the Anthurium Besseae Aff. indoor plant to the final touches of settling it in its new pot. Before diving into the repotting process, let’s outline the preparation steps, including the materials needed and how to set up a clean, organized workspace suited for efficient, mess-free repotting.
Preparing Your Workspace and Materials
To prepare your workspace, start by gathering the necessary repotting materials, including:
- A new pot with drainage holes (preferably 1-2 inches larger in diameter than the current pot)
- Anthurium Besseae Aff. specific soil mix
- Watering can
- Scissors or pruning shears for trimming roots (optional)
- Gardening gloves
- Old newspapers or a plastic sheet to cover your workspace
Next, choose an area with ample space to spread out the materials, ensuring you have enough room to maneuver and complete the repotting without feeling cramped. Cover the floor or tabletop with old newspapers or a plastic sheet to catch any soil or debris, making the clean-up process much easier.
Tip: Opt for an area with good lighting, so you can clearly see the roots and other plant components while repotting.
Now that your workspace is prepared and the materials are at hand, follow these steps repot your Anthurium Besseae Aff.:
- Remove the Anthurium Besseae Aff. from its current pot: Gently squeeze the pot’s sides, or if possible, tap it on the edge of your workspace to loosen the soil. Carefully slide the plant out of the pot, holding it by its base and ensuring not to damage the roots.
- Examine the root system: Inspect the roots for any signs of rot or damage, and trim away unhealthy sections using scissors or pruning shears. Gently shake off any excess soil, and untangle crowded roots, if necessary.
- Prepare the new pot: Place a small amount of the Anthurium Besseae Aff. specific soil mix in the bottom of the new pot, raising the level to provide a base for the plant to sit on.
- Place the plant in the new pot: Position your Anthurium Besseae Aff. in the center of the new pot, ensuring that the top of the root ball sits just below the pot’s rim. Adjust the soil level beneath the plant, if needed.
- Fill the pot with soil: Gently add the soil mix around the roots, filling the pot until it’s almost full. Ensure even coverage, and gently pat the soil down to secure the plant in place.
- Water the newly repotted Anthurium Besseae Aff.: Give the plant a thorough watering until water drains from the bottom of the pot. This helps to settle the soil and ensures your Anthurium Besseae Aff. is well-hydrated after repotting.
Your Anthurium Besseae Aff. has now been successfully repotted! Continue to the next section for post-repotting care tips, ensuring your plant thrives in its new environment.
Anthurium Besseae Aff Care Guide After Repotting

Now that you have successfully repotted your Anthurium Besseae Aff, it’s crucial to ensure it continues to thrive in its new environment. In this section, we’ll discuss the essential practices for post-repotting care, covering optimal light requirements and watering tips to prevent over-watering.
Optimal Light Requirements for Thriving Plants
Anthurium Besseae Aff requires a specific amount of light for optimal growth, particularly during its recovery stage after repotting. The right lighting conditions are essential for promoting healthy foliage and blooms for your Anthurium. Here’s what you should keep in mind:
- Place your Anthurium Besseae Aff in a well-lit area, but avoid direct sunlight. Direct sunlight can cause the leaves to scorch and turn yellow.
- Ensure your Anthurium receives consistent, bright, indirect light throughout the day. East-facing windows are ideal for providing gentle morning sunlight.
- If natural light is scarce, consider using a grow light. Maintain a schedule of 12 hours of artificial light daily to simulate day and night cycles.
Remember, proper light exposure is essential for the continuous growth and overall health of your Anthurium Besseae Aff.
Essential Watering Tips to Prevent Over-Watering
Watering is a critical aspect of Anthurium Besseae Aff care, especially after repotting. It’s important to strike the right balance when it comes to keeping the soil moist but not saturated. Here are some essential tips to help you prevent over-watering:
- Wait 1-2 days after repotting before watering. This allows the roots to settle into their new environment and prevents waterlogging.
- Use the “soak and dry” method—water your Anthurium thoroughly, allowing excess water to drain out of the pot, and wait until the top 1-2 inches of soil are dry before watering again.
- Keep in mind that the plant’s water requirements may vary depending on factors such as the humidity levels in your home and the growing season.
- Regularly check the moisture levels of the soil by inserting a finger or moisture meter 2 inches deep; if the soil feels dry, it’s time to water.
| Watering frequency | Indoor environment |
|---|---|
| Once a week | Average indoor humidity (40-60%) |
| Every 5 days | Low indoor humidity (<40%) |
| Every 10 days | High indoor humidity (>60%) |
Remember that over-watering can lead to root rot and other complications in your Anthurium Besseae Aff. By following the essential watering tips and ensuring the appropriate light requirements, your Anthurium will bounce back in no time and continue to flourish as a thriving indoor plant.
Et pour finir mon anthurium Besseae Aff, hâte de le voir bien grand pic.twitter.com/OMyD2MaBk9
— Arrangemento. #PlantsLover (@MuchGoldie) July 3, 2022
Conclusion
In summary, a healthy Anthurium Besseae Aff. can be easily achieved by following our comprehensive guide on repotting this stunning indoor plant. By understanding the plant’s unique needs and recognizing the signs indicating when it’s time to repot, you can provide the proper care and environment to keep your Anthurium thriving.
We discussed the importance of selecting the right pot and soil mix, ensuring that your Anthurium Besseae Aff. has sufficient drainage and root aeration for optimal growth. As a recap, make sure to choose a pot that provides ample drainage and a soil mixture that caters to the plant’s specific nutrient requirements.
Furthermore, keep in mind that post-repotting care is crucial for this delicate plant. Ensuring optimal light conditions, watering practices, and maintaining proper humidity levels will set your Anthurium on a path towards flourishing indoor growth. Confidence in repotting and subsequently caring for your plant will undoubtedly lead to a thriving and happy Anthurium Besseae Aff.
FAQ
How often should I repot my Anthurium Besseae Aff?
Generally, Anthurium Besseae Aff should be repotted every 2-3 years or when showing signs of overcrowded roots, sluggish growth, or water drainage issues.
What type of pot is best for Anthurium Besseae Aff?
Choose a pot with adequate drainage and enough space for the plant to grow. Materials such as terracotta or ceramic work well as they allow the roots to breathe, while plastic pots tend to retain moisture.
What is the ideal soil mix for Anthurium Besseae Aff?
The ideal soil mix for Anthurium Besseae Aff should be well-draining and rich in organic matter. A combination of high-quality potting mix, peat, perlite, and bark will provide adequate aeration and nutrient retention for healthy root growth.
What are the optimal light conditions for Anthurium Besseae Aff after repotting?
Anthurium Besseae Aff thrives in bright, indirect light. Make sure to place it near a window with filtered sunlight to prevent stress and encourage vigorous growth.
How should I water my Anthurium Besseae Aff after repotting?
After repotting, water your Anthurium Besseae Aff thoroughly, allowing the water to drain out. Then, continue watering the plant regularly, ensuring the soil remains moist but not saturated, to prevent over-watering and root rot.
What is the ideal temperature and humidity for Anthurium Besseae Aff?
Anthurium Besseae Aff prefers a warm and humid environment, with temperatures between 65°F and 80°F (18°C and 27°C). The humidity level should be around 60-70%. You can maintain proper humidity by placing the plant on a humidity tray or using a humidifier.